Nano-Coating of Copper
Sommaire
Nano-revêtement de cuivre

Le matériau de base pour le nano-revêtement est le cuivre sous toutes ses formes. Le revêtement est réalisé soit par gravure chimique (revêtement à la vapeur avec de la soude caustique NaOH) ou thermiquement par chauffage (revêtement au feu par brûleur à gaz). Durant le processus de nano-revêtement, des intervalles entre les atomes [la plupart des couches externes du cuivre] sont créés. Le revêtement est souvent appelé nano-revêtement, dont les couches s'accumulent durant le processus de création du revêtement.
Nano-revêtement utilisant de la soude caustique (NaOH)
Pour revêtir des fils ou des plaques de cuivre, vous aurez besoin :
- D’un récipient en plastique avec couvercle (pas trop grand).
- De poids pour appuyer sur le couvercle.
- De bobines de cuivre, de fils ou de plaques.
- ~ 100 grammes de soude caustique pure (NaOH) en poudre ou en perles (ne pas utiliser de produits déboucheurs. Vous pouvez acheter la soude caustique dans les magasins de peinture ou en droguerie. Elle est utilisée pour enlever la peinture en tant que décapant à base alcaline).
- ~ 2 litres d'eau distillée (en fonction de la quantité de bobines et de la taille du récipient en matière plastique).
- D’une bouilloire électrique ou d’une cuisinière pour faire bouillir l'eau.

Sodium hydroxide in small beads or flakes (cost: approximately 10 euros / kg)
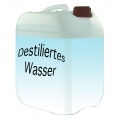
Distilled water
Plastic container with lid and weight.

"Raw" copper coils.


Phase 1 : Bain de soude caustique (~ 2 jours)
Cette première étape prépare les matériaux pour la méthode de revêtement à la vapeur :
- Un grillage galvanisé (au zinc) est placée au fond du récipient en plastique.
- Répandre juste assez de poudre de NaOH pour couvrir tout le fond du récipient.
- Avant de placer les plaques dans le récipient, vous pouvez percer un petit trou aux coins supérieurs de chaque plaque. Ceux-ci seront utilisés dans la phase 2.
- Placez les bobines et/ou les plaques directement sur le grillage (les bobines et/ou plaques reposent sur la grille de façon à ne pas toucher le plastique).
- Placez le couvercle, légèrement à l’oblique, sur le récipient. Laissez une petite ouverture.
- Faites bouillir de l'eau distillée et versez l'eau bouillante dans le récipient via l'ouverture jusqu'à ce que l'eau recouvre toutes les bobines et les plaques.
- Fermez rapidement l'ouverture en plaçant le couvercle correctement sur le récipient.
- Si nécessaire, placez un poids sur le couvercle pour vous assurer que la vapeur s'échappe le moins possible.
- Laissez le récipient dans cet état pendant 24 heures.
ATTENTION, pendant que vous versez de l'eau bouillante, la vapeur va s'échapper. Prière de porter des lunettes et des gants de protection pendant ce processus.
Phase 1: Caustic bath (~ 2 days)
This first stage prepares the materials for the steam coating process:
- A zinc grid (can be a mesh, which is zinc coated) is placed at the bottom of the plastic container.
- Scatter just enough NaOH powder to cover the entire bottom of the container.
- Before placing the plates in the container, you can drill a small hole at the top corners of the plate(s) which will be used in Phase 2.
- Hang the coils and/or plates directly in the container, so that they do not touch each other and the container
- Place the lid, slightly askew, on the container. Leave a small opening.
- Boil distilled water and pour it (boiling) into the container via the opening until water covers all the coils and/or the plates.
- Quickly close the opening by placing the lid correctly on the container.
- If necessary, place a weight on the lid to ensure as little steam as possible escapes.
- Leave the container in this state for 24 hours.
Caution, during the pouring of boiling water, steam will escapes. Please wear protective glasses and protective gloves during this process.
Phase 2: Caustic Steam (~ 2 days)
- After 24 hours have passed, open the plastic container and remove the coils and/or plates. NOTE: Use tight fitting gloves (for example, medical) and lift the plates out by the edges or use a wire through the hole you drilled in the plates. Ensure to touch the coils/plates in ONLY one area when you need to lift them to prevent damaging the nano-coating. Leave the mesh in the container.
- You will notice that the coils/plates have turned black. This is the nano-coating.
- Remove the liquid from the container. (Caution - store or dispose of the liquid correctly)
- Hang the coils or plates, which were previously submerged in NaOH water, on copper wires (utilize the holes at the corners of the plates to hang the plates).
- The coils should hang roughly 2cm above the bottom of the container and should not touch the container walls, the mesh or the other coils or plates.
- The plates stand on the mesh, vertically, hung on wires.
- Place NaOH to cover the bottom of the container as in Phase 1.
- Place the lid askew.
- Boil distilled water and pour it boiling through the hole to a depth of roughly 1cm.
- Close and fasten the lid quickly to stop steam from escaping.
- Let stand for 2 days.
(Caution - Use protective glasses and protective gloves during this process).
Phase 3: Drying/draining (minimum 3-4 days)
- The coils and/or plates now begin the drying process.
- Pour most of the liquid out of the container. Leave a bit of the water in the container and leave it covered, not weighted.
- Every 6 hours, for the next 3 or 4 days, take a multimeter (set on mv) and touch with the negative pole one end of the plate and with the positive pole at several positions to drain the plate(s) voltage.
- For coils, if its a double coil, touch the coil with the negative pole of a multimeter at the positive pole of the coil and touch the positive pole of the multimeter at the negative pole of the coil for a few seconds, to drain the voltage out of the coil(s).
- When this process is completed, never touch the nano-coating and ensure the coils and/or plates never touch each other.
You can watch this process again on this Official Youtube Video from the Spaceshipinstitute:
Nano-Coating Using A Gas Burner

With this type of coating process it is not necessary to go through the process of polarization (draining the voltage) and drying. However, temperature and direction of application of the fire coating is crucial. When applying the fire coat, the direction in which you apply the flame to the copper must always be in the direction of flow of the coiled wires and the wires must never reach a point of glowing due to the application of heat. Once the wires are heated to a point where they begin to emit a golden shimmer, the gas burner should be moved to an adjacent point on the wires. (For clarification, this will be explained in detail below in an accompanying video).
Moreover, the coils will begin to cool as soon as you move the flame from an area that is being heated to an adjacent point. If, after a few seconds of the heat being removed from an area, the wires take on different colors like red, turquoise or blue throughout the area, this is an indication that the temperature during the fire coating of that area was too low. If this occurs, simply return the flame to the area and coat it again before moving to an adjacent area. If however the wire begins to glow, the temperature is too high and you should back the burner away from the coils slightly to decrease the temperature and continue coating. With practice, the application process becomes automatic.
To fire coat, you require:
- A gas burner with butane gas (it also works with a propane / butane mixture)
- Copper coils or plates
- Refractory mounting device for mounting/hanging the coils or plates (preferably metallic)
Important: Do not apply the fire coat in rooms that are too cold. Doing so will cause the coating layer to easily separate from the copper wire. There are also differences in quality of the copper wires. Sometimes slight cracks at the surface of the raw uncoated wire can be detected.
Note: Please use a gas burner with a tight and narrow pointed flame when applying the coating to ensure very accurate pinpoint application at an area on the wire. If you use a wide, broad flame you will heat up too wide of an area of wire at once. This will result in inaccuracy in the direction of heating of each coil. (Please view the following video for clarification).
https://www.youtube.com/watch?v=gRaeT-7zIJs Fire Coating Video
When nano-coating copper using fire, it is done at least in two or more sessions depending on how consistent you become in each session. Between each session, the copper is allowed to cool at room temperature. During the cooling process the copper continues to interact with the atmosphere and you will begin to see a change in color on the surface of the copper. The reaction of the nano-coated copper during the succeeding sessions will be different compared to the first session when fire is first applied. On each succeeding session, the nano layer on the surface of the copper also acts as another layer of conductor and a heat sink. When the flame is applied, this surface layer will start to change into a dull color copper before reaching that right temperature of "shimmering surface" look. We still look for that "golden shimmering" moment as in the previous session and move the flame to the adjacent area. A third or more sessions is only required when you see inconsistency of nano-coating colors due to uneven lower heat application or flaking nano layers due to excessive heat application.
Important: For a magrav set of coils or multiple coils formation, the color of the inner coil (gravitational) and the color of the outer coil (magnetical) will usually manifest differently from each other due to the field interaction of the nano layers as they are created during the nano-coating process. Different materials (different batch of copper) will also have a different nano-coating layer. The environmental conditions (flame temperature, atmospheric air quality and temperature, plasma fields) during the nano-coating process greatly influence how the nano materials will manifest on the surface of the material like copper.
Prepare nano-coated material for GANS-production
Before you go into the production of GANS you have to wash the nano-coated material, otherwise you add the caustic to the GANS-water. Wash the plates best with distilled water several times, please use protections gloves during this process, do not touch caustic or nano-coated material. After washing, you can put the plates or coils immediately into your containers of GANS production. As long as you do not need your plates, leave them in your container, you can store them there, without washing. As soon as you wash your plates or coils, you stop the growth of nano-layers.